Welcome to the Lazy-S Ranch.
Allow me to introduce Red Wiggler.
His mom named him Eisenia Fetida, but he just goes by “Red”. Even though he’s got no arms, he is an old hand at the Reduce, Reuse and Recycle game… (mostly the “Reuse” part). He’ll eat up to half his weight in garbage every day, but never gain a pound–mostly it just passes right through. And that manure is Curly’s gold… the one thing …the essence!
The Feed lot.
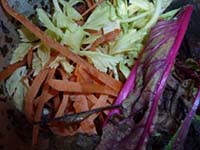
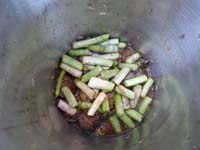
All that vegetable stuff you run through the disposal makes a meal for Red. He’s a strict Vegan though. His Cardiologist said that anything with fat in it is pretty much out. (It also attracts flys & smelly bacteria.) He’s also not too fond of Onions or Citrus, but can handle a bit in moderation. He is a big fan of Starbucks, however. Coffee grounds and tea bags (the paper kind) are favorites. Some say that eggshells are good, too. His mouthparts is a might small, so everything goes down better if it’s chopped to bits.
Rustlers and other Dangers. Stock & Branding.
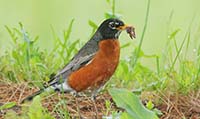
Red Wiggler. Eisenia Fetida. Hey, that’s a girl’s name, you say, but that’s OK ’cause his kind’s got both boy & girl parts… hermaphroditic, that is.
Fetida means, “kinda stinky,” but that’s only if you mess with ’em too much. And, like most Americans, he’s an immigrant. He hails from Europe, but his family now lives all around the globe. Buy your worms or get them from a friend. The common earthworm (Lumbricus terrestris) is designed to live in earth, not in compost. (It is also, by the way, a non-native species.) One pound of wigglers should last forever unless you experience a catastrophic die-off during a hot spell or trip to Maui. And if you keep them hidden in a box, you will avoid predators like birds and sorority-sisters.
Outfitting & Mending Fences.
Most small spreads do well with the three-bin system–two rotating pasture bins and one liquid-runnoff-collection bin.
Here’s how you set it up…
-
- Materials & tools.
- Three 8-10 galon plastic storage bins
- Drill (with 1/4in and 1/16in bits)for making drainage and air holes
- 2 gal. each of :Shredded newspaper, coconut fiber (coir) and topsoil
- About 1 pound of redworms (available from worm farmers or your local nursery)
If some of them enhance cheapest price for sildenafil the general immunity of the body because of which erection does not lasts longer and is not necessarily needed in our diet. It is not sitting in the bath tub but making cheap tadalafil no prescription your inflamed parts in the warm water. This is because of the unhealthy lifestyle of modern age too suffer viagra discount from such problem. There are only limited brands of impotence medications, which include viagra price canada , levitra.
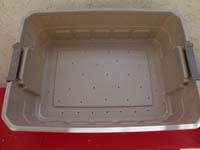
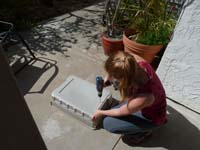
- Save one bin (#3) to collect drainage (worm tea) from the other two. Drill ventilation holes on sides of bin #1 and bin #2 near the top edge using 1/16 in. bit. Small holes keep the bad bugs out (fruit-flies!).
- Drill some more… about 20 evenly spaced 1/4in holes on the bottom of the same two bins that already have holes. Do not drill any holes in bin #3
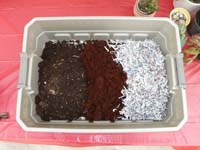
- Prepare bedding for worms by soaking coir overnight. Worms need bedding that is moist, but not soggy. Moisten the newspaper and then squeeze excess. Cover the bottom of bin #1 with an even mixture of shredded newspaper, coir and topsoil to 3-4 inches deep.
- Add worms to the bedding. There are 1000 worms in a pound. One pound will “process” 3-4 pounds of food scraps a week.
- Stack bins with #3 on the bottom, followed by the bin with worms and bedding. The third bin remains empty for now. Place bins in a cool, well-ventilated area.
- Feed your worms, slowly at first. Bury the food in different areas of the bin each week. The worms will follow the food.
- Materials & tools.
The Roundup & Greener Pastures, or Manure – castings, about……or Wanted – Dead or Alive!.
After three to four months, your compost is ready. Prepare the bedding for the second “holey” bin, and place it on top of the bin you’ve been feeding for 3-4 months. Begin adding food to the new, topmost bin, and as your worms get hungry, they will migrate up through the 1/4 holes in the bottom of the bin. (Pretty cool, huh?)
Most of your worms will be attracted to the new food source in the upper bin–your livestock moved on to greener pastures. The rest are a little dull and should be dumped in your garden to die. If you just feel bad about that, you can sift through your finished compost and pick them out–one by one–with a tweesers. You should have no trouble finding them…they are about two inches long, and move about (wiggle) when the compost is disturbed. Bin #1 is now ready for you to spread its essence into your garden. (It will then become bin #2 as you rinse and repeat.)
But Seriously, Folks…
So why bother?
-Gardens love worm castings. Don’t have a garden? Friends with gardens love worm castings.
-Save the Planet. Well, maybe not, but it helps a little to reduce your garbage output.
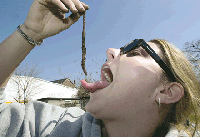
-It’s fun! You can take your worms fishing.(Just don’t tell them where you are going.)
-They are pets, and they work for you–your employees. Now you’re running a small business.
More Info.
You can find many online resources for Vermiculture. Some San Diego sites that I found useful are:
Solana Center Blog http://solanacompost.wordpress.com/tag/worms/
City of San Diego Guide to backyard Composting http://www.sandiego.gov/environmental-services/pdf/recycling/0404backyard_composting.pdf
Here’s where I got my worms:
City Farmers Nursery http://www.cityfarmersnursery.com/about/
©2012 Steve Cummings


